Clearance in 3D printing: why parts need a gap
Two 3D printed parts that must fit together need a gap, called clearance. On filament printers, holes often come out a little smaller than drawn, so a peg drawn the size of its hole can get stuck. Leave a gap. If you are not sure how big, print a small test strip first and use the gap that fits.
Last updated 11 November 2026.
Where Makerlane is today
Makerlane is a 3D printing service in Singapore. Upload a file at makerlane.sg to see your print price, with no sign-up.
What is clearance in 3D printing?
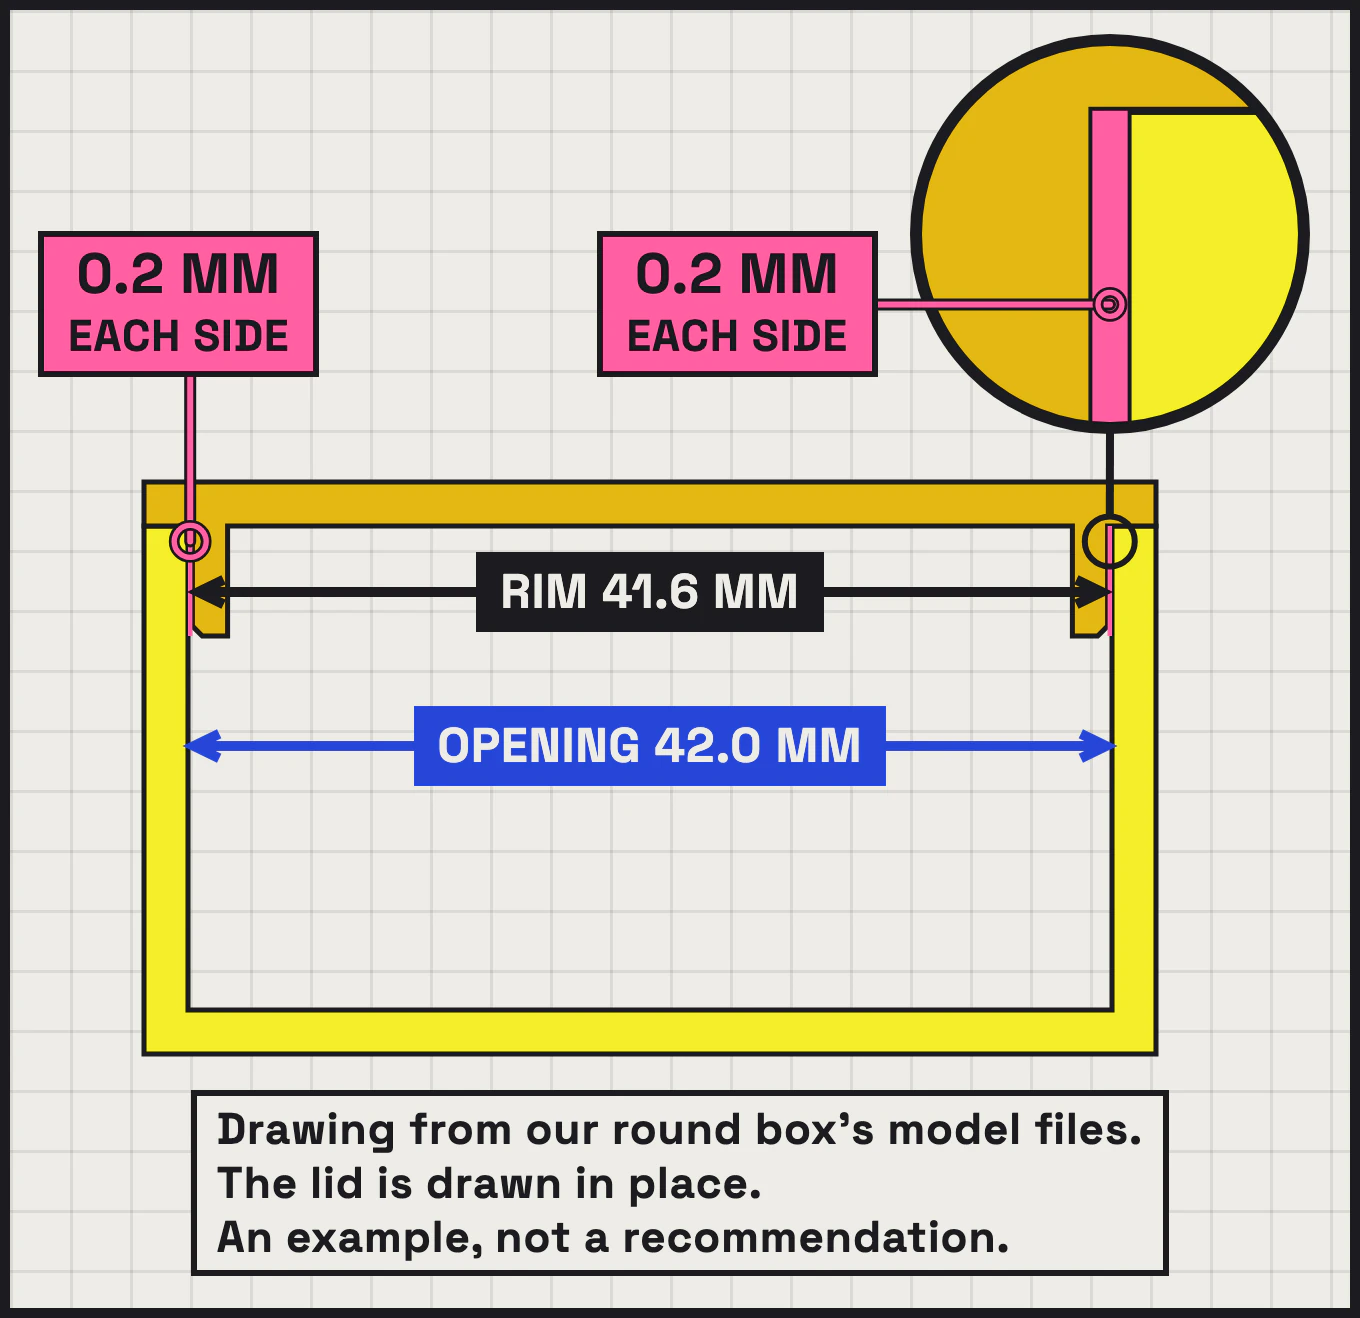
Clearance is the gap between two printed parts that fit together, such as a peg and its hole. On this page, the gap is how much bigger the hole is than the peg, in total. If the peg sits in the middle, half of the gap is on each side. Some guides on tolerances cover clearance too.
Our round box, designed by Makerlane, has a push-on lid: a rim under the lid goes into the box's opening, like a peg into a hole. In the model files, the opening is 42.0 mm wide and the rim is 41.6 mm wide. On paper, that leaves a gap of 0.4 mm in total, 0.2 mm on each side. That is an example, not a recommendation.
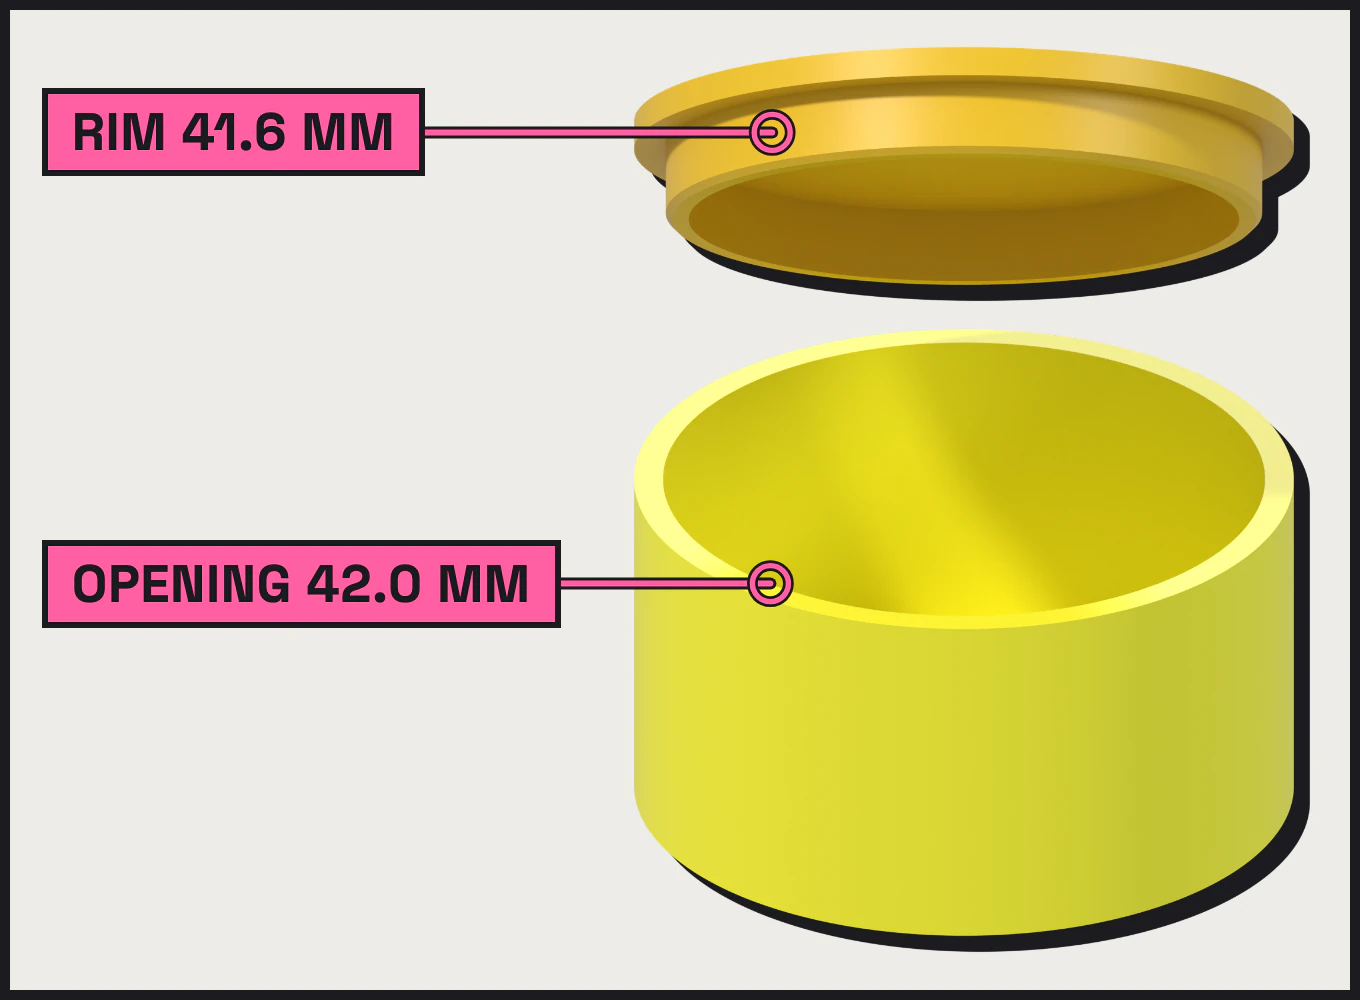
Every picture on this page is a 3D render or a drawing, not a photo, and no print is shown. The box and its lid were never printed.
Why do 3D printed holes come out small?
On printers that melt plastic filament, holes often come out a little smaller than drawn. The nozzle presses each line of plastic flat, so it spreads wider and the hole ends up smaller. Plastic also shrinks as it cools, which can make holes smaller too.
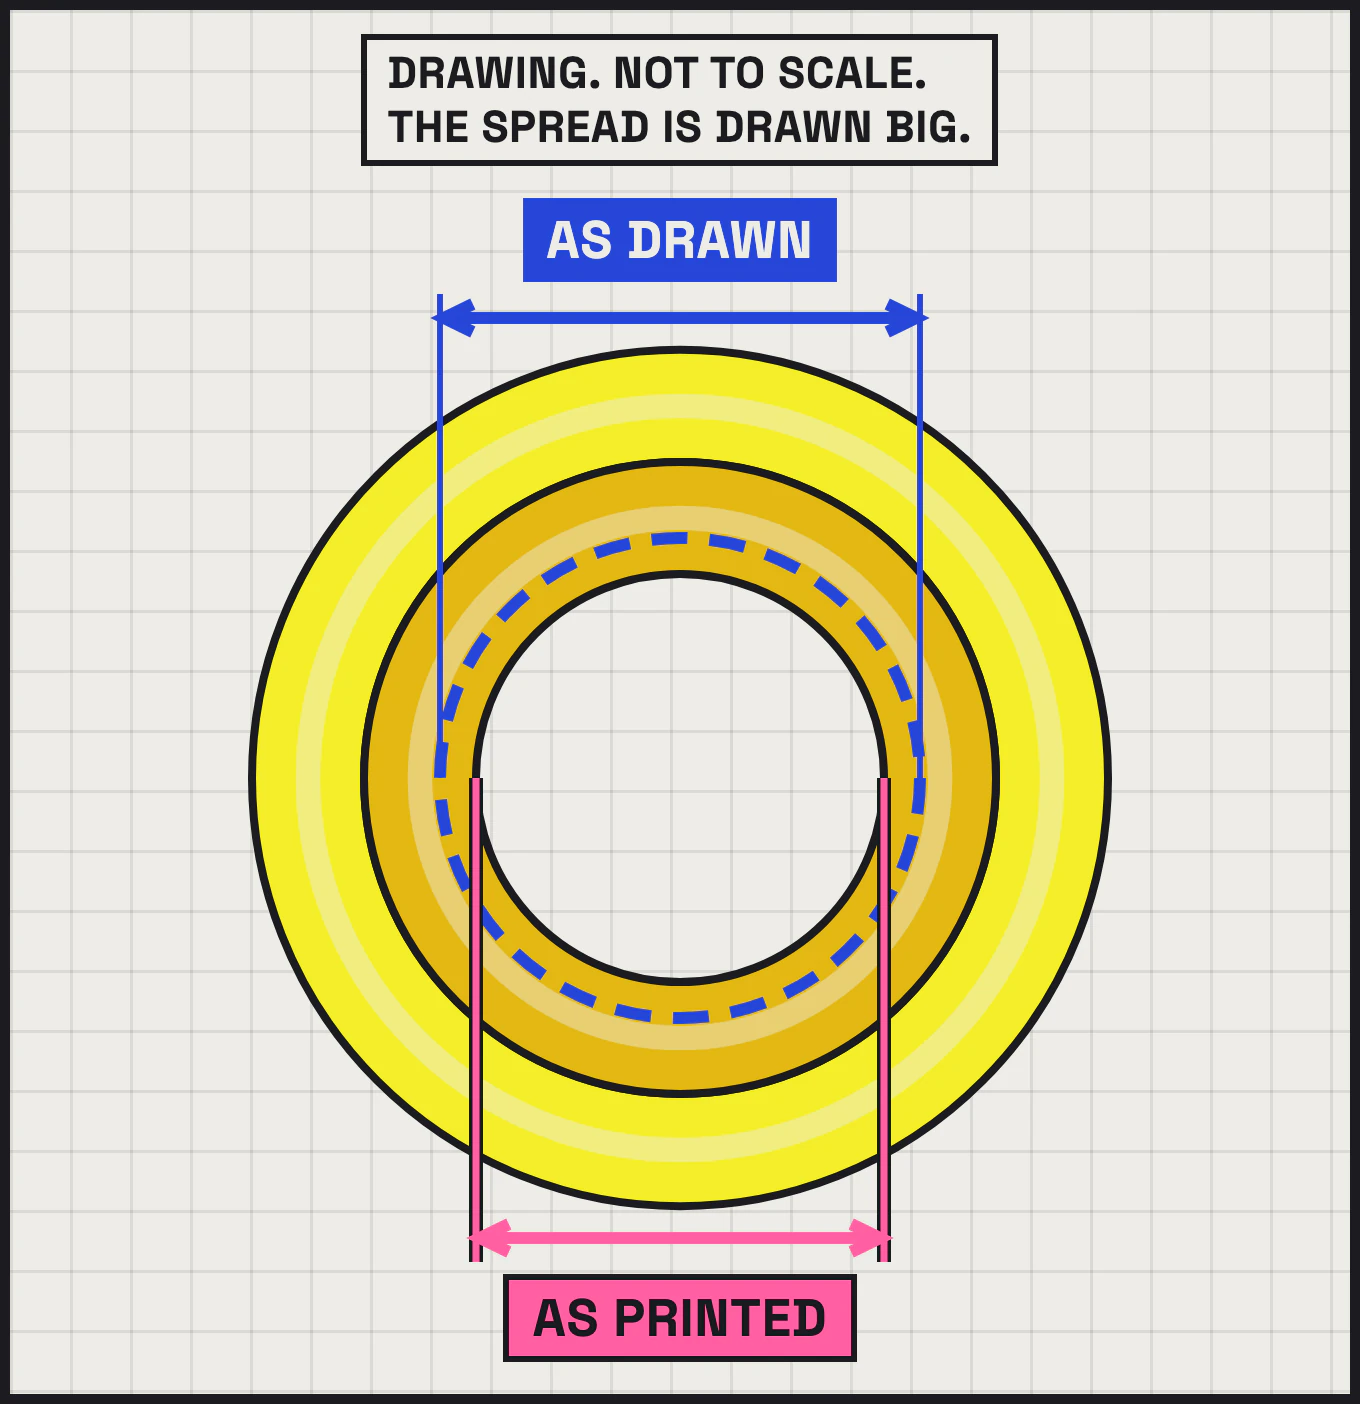
So a peg drawn the size of its hole can get stuck. A screw or a ready-made pin can stick the same way in a printed hole drawn to its size.
How much clearance should I leave?
It depends on how tight you want the fit. It also depends on your printer, your plastic, your settings and the size of the hole. There is no one gap that always works. Test it with a small print, on the printer and in the plastic you will use for the real part.
Some tips give a gap size without saying whether it is on each side or in total. Check which one a tip means before you use it, because the gap in total is twice the gap on each side. If a tip does not say, test instead.
How do I test the gap?
Print a small test strip: one peg and five holes, 0.1 to 0.5 mm bigger than the peg, in steps of 0.1 mm. Use the same plastic and settings as the big print. Try the peg in each hole, keep the one that fits the way you want, and draw that gap into the real model.
Make the test peg the same size as your real one, and print the strip the same way up as the real part. The fit can change with both.
If even the biggest hole is too tight, or the smallest is too loose, print another strip with the sizes moved up or down.
Does the gap depend on the plastic?
It can. How much smaller a hole prints depends on the plastic as well as the printer. A gap that fits in one plastic may be tight or loose in another. If you change plastic, print the test strip again in the new one.
What should I do next?
Find each place in your model where two parts meet, or where something goes into a printed hole. Leave a gap there, then print a small test strip before the big print.
If someone else prints your file, you usually cannot tune their printer, so draw the gap into the model yourself.
Scaling changes the gap too: at half size, a 0.4 mm gap becomes 0.2 mm. At makerlane.sg you can change the scale on the page with your print price, so check your gaps again if you do.
The print price you lock never goes up. You see the handling fee and delivery before you pay, and nothing is added after you pay. Left a gap? See your print price in seconds at makerlane.sg.